


Accidentally deleting an important file can be stressful, whether it’s a work document, family photo, business folder, or another file that you can’t replace. The good news is that your deleted files aren’t always gone forever. In many cases, recovery is possible, especially if your original data hasn’t been overwritten.
The most important first step is to act carefully. Continuing to use the same hard drive, and especially writing lots of new data to it, can reduce your chance of a successful recovery — so it’s worth understanding your options before you try any random fixes.
In this guide, we’ll explain what happens to a file when it’s deleted, what you should do first, how to check the Recycle Bin or Trash, how to restore from backups, and how SecureRecovery® or other trusted recovery software could help. We’ll also explain when it’s best to stop and seek professional data recovery support instead. Let’s dive in.
What Happens When You Delete a File from a Hard Drive?
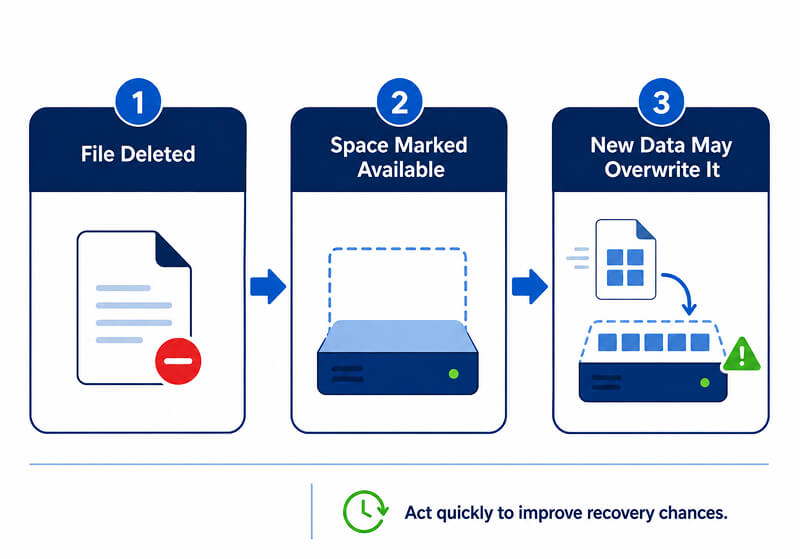
When you delete a file from a hard drive, the data isn’t always immediately wiped entirely. In most cases, your system removes the visible reference to the file, then it marks that space as available for new data. Until something else is saved over that space, your deleted file can likely still be recovered.
This is why it’s important to stop using the drive as soon as you realise that you’ve deleted something important. Saving new files, installing software, downloading updates — and sometimes, even normal system activity — can overwrite your deleted data and reduce your chance of recovery.
If you’re using a traditional hard disk drive (HDD), recovery is often more likely. SSDs can sometimes be more difficult because of the way they manage deleted data. Features such as TRIM can clear unused blocks in the background, which can make deleted files much more challenging to recover.
The sooner you stop using the affected drive, the better your chances of safely recovering your deleted files — especially if you’re using an SSD.
First: Stop Using the Drive
As soon as you realise that your important files are missing, stop using the affected computer, internal hard drive, or external drive if possible. The more you use it, the higher the chance that your deleted data will be overwritten.
To protect your recovery chances:
- Do not save new files to the same drive
- Do not install recovery software on your affected drive
- Do not recover files back onto the same drive
- Do not format, partition, or run repair commands unless your data is already backed up
- Disconnect external drives safely if you can do so without causing further issues
Your best bet is usually to connect the drive to a different system, or install recovery software onto another drive. Then, from there, you can scan the affected drive. If your files can be recovered, save them to a separate storage device rather than the original one.
Following these steps will help you avoid accidentally overwriting, giving you the best chance of recovering your deleted files successfully.
Check the Recycle Bin (Windows) or Trash (Mac)
Before we move on to more advanced recovery options, let’s start with the simplest one. If your deleted file hasn’t been permanently removed, you might be able to restore it with just a few clicks.
On Windows
To see if your files haven’t been permanently deleted on Windows, follow these steps:
- Open Recycle Bin from the desktop.
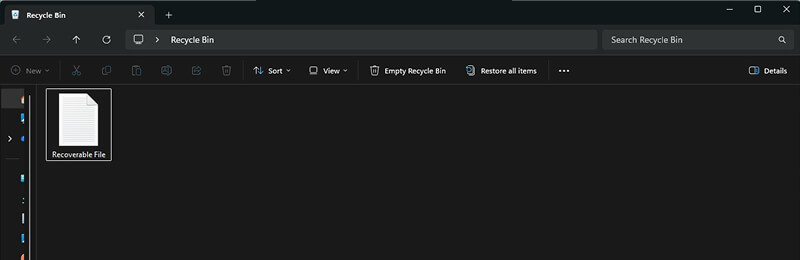
- Search or browse for your deleted file.
- If your file is listed, right-click on it.
- Select Restore.
Windows will usually restore your file to its original location. If you’re not sure where that was, search for your file name in File Explorer after you restore it.
On Mac
If you’re using a Mac, follow these steps to see whether your file is still in Trash and restore it.
- Open Trash from the Dock.
- Find your deleted file.
- Right-click or Control-click the file.
- Select Put Back.
macOS usually returns the file to the folder it was deleted from. Much like with Windows, this option only works if Trash has not been emptied.
Restore Deleted Files from a Backup
If you have backups, they’re often the safest way to recover your deleted files, because they don’t require scanning your affected hard drive. If you have a recent backup, check it before you move on to using recovery software.
Windows File History
If File History was enabled before your file was deleted, you may be able to restore an earlier version of the file or folder.
Go to the folder where the file was originally stored, right-click inside the folder, and look for restore or previous version options. You may need to connect the external drive or network location used for File History backups.
Mac Time Machine
On Mac, Time Machine can restore your files and folders from earlier backups. Open the folder where the deleted file was stored, enter Time Machine, browse older versions, and restore the selected item. Time Machine returns the file to its original folder.
Cloud Backups
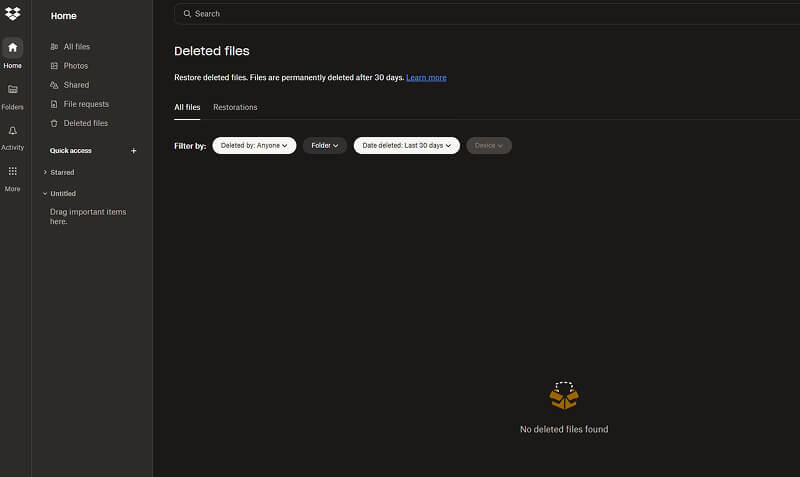
If you keep synced cloud backups of the folder that contained your deleted file, it’s worth checking your relevant cloud accounts. Look for recently deleted files or folders, version history, or admin retention settings if the account is managed by an organisation.
Use Data Recovery Software Safely
If your file isn’t in the Recycle Bin, Trash, or a backup, data recovery software may be able to help. There are several third-party recovery tools available — but it’s important to make sure you choose a reputable one. Whichever option you use, the same safety rules apply: do not install the software on your affected drive, and do not save recovered files back onto the same drive.
Software recovery is best suited for cases of logical data loss, such as deleted files, reformatted drives, corrupted files, or damaged file systems. If you’re seeing any symptoms of a physically damaged drive — like clicking, beeping, or overheating — stop and contact a professional instead.
Let’s take a closer look at two data recovery tools you can use to attempt to recover your deleted files.
Microsoft Windows File Recovery
If you’re using Windows, you can try Microsoft Windows File Recovery, a free command-line tool for recovering deleted files that are no longer in the Recycle Bin. While it can be useful, it’s less beginner-friendly than third-party recovery software because it runs through Command Prompt or Windows Terminal.
Here’s how you can use Windows File Recovery to try to recover your file:
- Download and install Windows File Recovery from the Microsoft Store.
- Connect a separate destination drive for your recovered files.
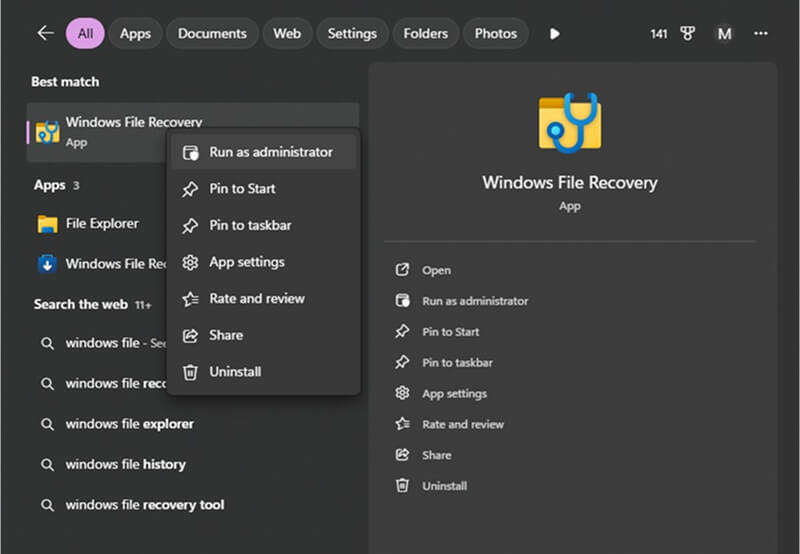
- Open the tool with administrator privileges:
- Search “Windows File Recovery” in the Windows search bar.
- Right-click Windows File Recovery, and select Run as Administrator.
- Enter the recovery command in the following format: winfr <source-drive>: <destination-drive>: [/mode] [/switches]
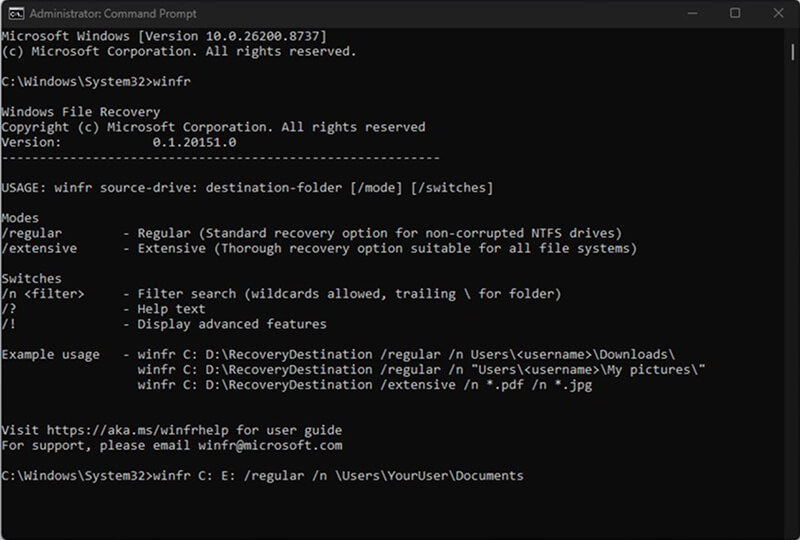
- For instance, if you want to recover your Documents folder from your C: drive to the recovery folder on an E: drive, using regular recovery mode, enter the following command:
- winfr C: E: /regular /n \Users\<username>\Documents\
- For a full list of commands and recovery modes, refer to Microsoft’s Windows File Recovery documentation.
- Review your recovered files in your destination folder.
Remember, your destination folder must not be on the same drive that’s being scanned. For example, do not scan the C: drive and save recovered files back to C:. This helps avoid overwriting deleted data during recovery.
Use SecureRecovery® Data Recovery Software
SecureRecovery® Data Recovery Software for Windows and Mac is designed to make the recovery process as simple as possible. In addition to being able to recover deleted files, it can also help recover files that have been lost through reformatting, corruption, or file damage.
The software works by analysing your selected drive, checking the condition of the media, and searching for recoverable files. It then provides a list of files that may be recovered, so you can review the results before purchasing a licence for full recovery.
At a glance, the process is as follows:
- Download and install SecureRecovery® on a different drive or computer.
- Connect your affected hard drive if it is external.
- Select the drive or partition you want to scan.
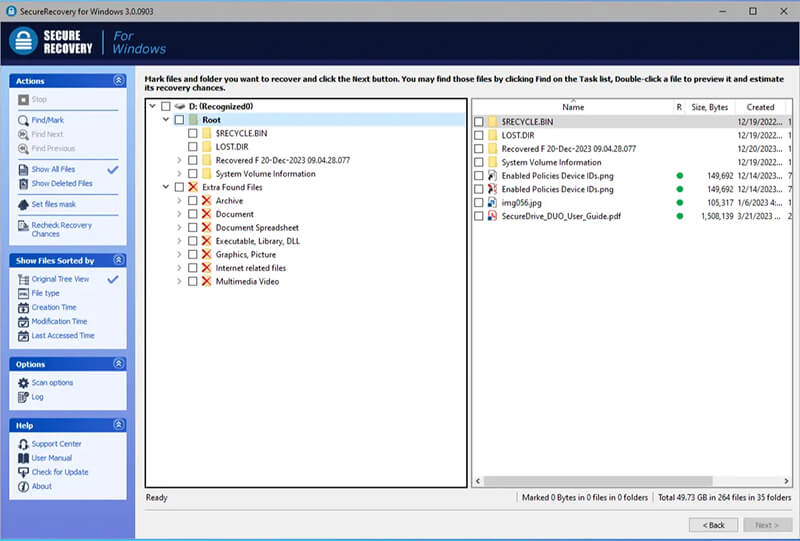
- Review the list of recoverable files.
- Preview files and recovery probability where available.
- Purchase a licence if you are satisfied with the demo results.
- Save recovered files to a separate drive or folder.
SecureRecovery® works with both Windows and Mac, and supports common file systems including NTFS, FAT, exFAT, HFS/HFS+, and APFS. It also includes advanced file search, multiple file recovery, media health analysis, and media imaging support.
Remember: SecureRecovery® isn’t designed for physically damaged drives. Do not use software recovery if the device is making unusual noises, failing to appear, or showing signs of physical damage.
How to Maximise Your Chance of a Successful Recovery
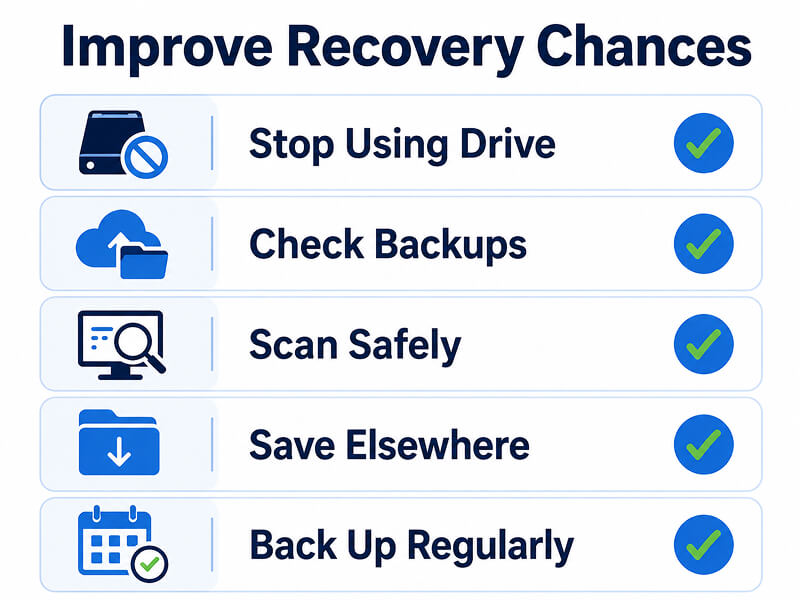
Deleted files are often still recoverable if they haven’t been overwritten — but your actions after deletion matter. To err on the side of caution, stop using your affected drive and check your simplest recovery options first.
Start with the Recycle Bin or Trash, then check any backups you may have before scanning the drive. If you use recovery software, install it on a different drive or computer where possible. You should also make sure to always save recovered files to a separate storage device rather than onto the original hard drive.
To reduce your risk of future data loss, keep regular backups using the 3-2-1 rule: three copies of your important data, stored on two different types of media, with one copy kept offsite. Using both cloud backup and local backups also give you more recovery options, while reducing your potential points of failure.
Finally, make sure to test your backups occasionally, so you know that they’ll work when you need them most.
Recover Deleted Files Safely with Secure Data Recovery
If you’re trying to recover deleted files, try the SecureRecovery® demo to see whether your files may be recoverable. If your drive is damaged, failing, or contains irreplaceable data, get in touch with us at Secure Data Recovery UK today — our experts are available 24/7 to help you get your data back.


